Compute instances
Creating compute instances
Open the Cloud console
In the left menu, click Compute and then Instances:

The page that loads offers actions such as Launch Instance, Delete instances, and More Actions (to act on the selected instances), along with a list of previously created instances.
To start creating the instance, click Launch Instance
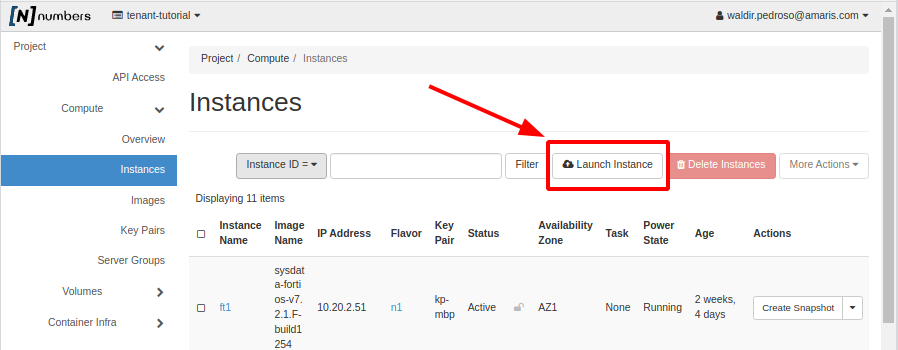
In the window that opens, give the instance a name. Then click Next at the bottom.
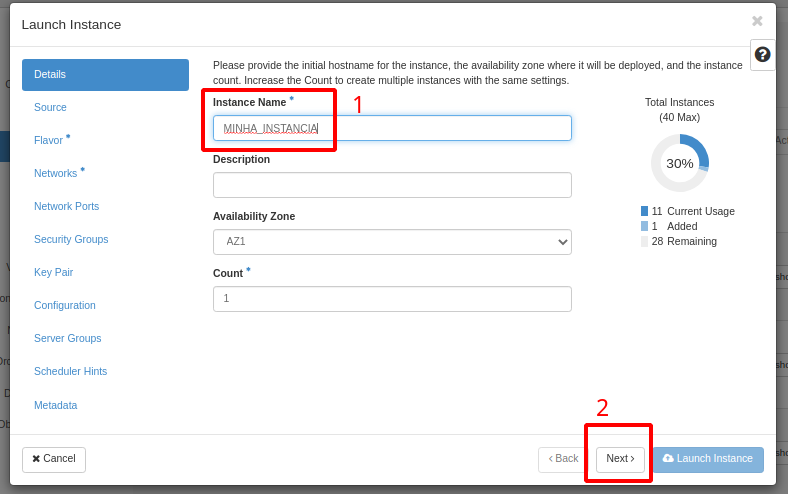
On the next screen you choose the boot source; in this walkthrough we use Image, as shown in (item 1).
In (item 2) we click Yes, telling the platform to create a new volume (a virtual disk) for this instance. We recommend using volumes because they are easier to administer, back up, and restore.
Given that the selected boot source was "Image", it is worth noting the difference between creating a new volume and not creating one:
- Choosing
No, so no new volume is created, means the rebuild option can be used to refresh the instance with the same parameters (network, key pair, and so on); the available volume is sized according to the flavor chosen on the next screen.- Choosing
Yes, on the other hand, creates a volume sized according to the flavor specified on the next screen.
In (item 3) we state (Yes or No) whether we want to keep the disk after deleting the instance. This is useful if you may later want to reach the data on that disk once the instance is gone. Note that volumes (virtual disks) kept on the account are billed. See the Volumes walkthrough
In (item 4) we select the operating system we want. Note that after clicking the up arrow, it moves to the top, as shown.
Once this screen is filled in, click (item 5) to set the resources (CPU, memory, and volume size).
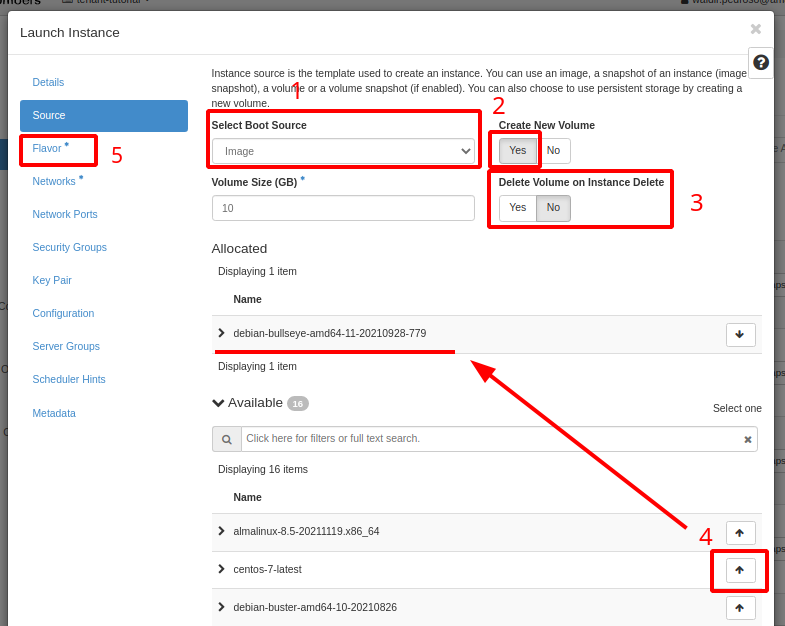
On this screen we pick a plan for the instance. Each plan shows an amount of CPU, memory, and volume size. Once chosen, click the up arrow as shown:
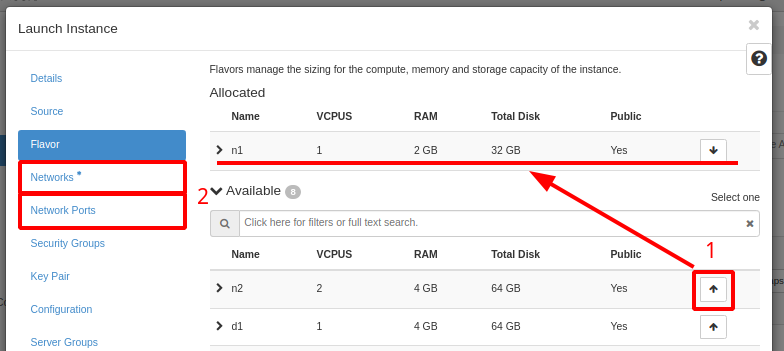
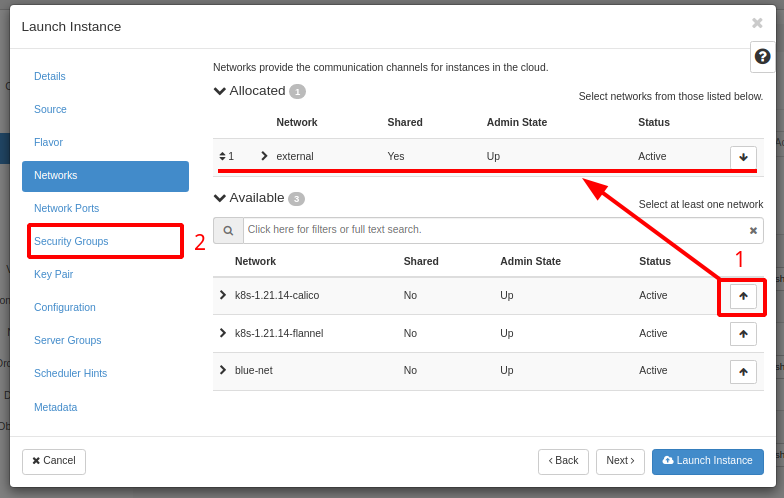
After picking the plan, we need to decide which network(s) to attach the instance to. You can attach more than one, and/or use a fixed IP defined earlier. To use a fixed IP you need to create a port (see the ports walkthrough), then click Network Ports in the menu and select the port you created. If you want an IP assigned at random (DHCP), select Networks in the menu and pick the network(s) by clicking the up arrow, as shown below (item 1).
Then we associate a Security Group (item 2)
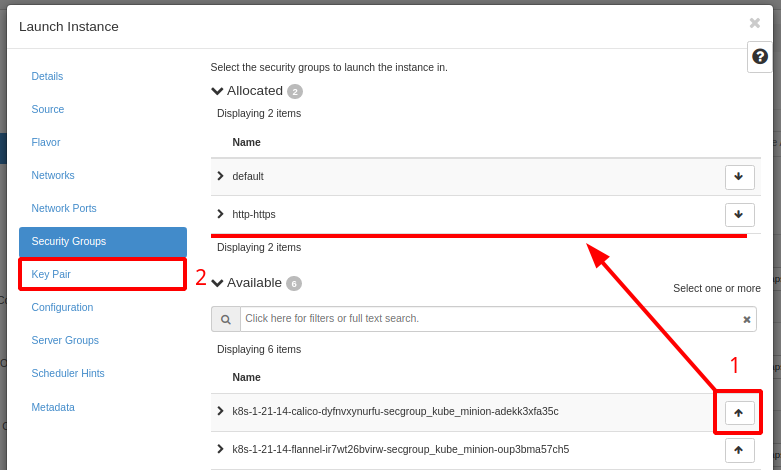
A Security Group is the equivalent of a firewall, but at the Cloud level. See the Security groups walkthrough. In the list (item 1), select the group(s) by clicking the up arrow. Once selected, move to the next step by clicking Key Pair (item 2).
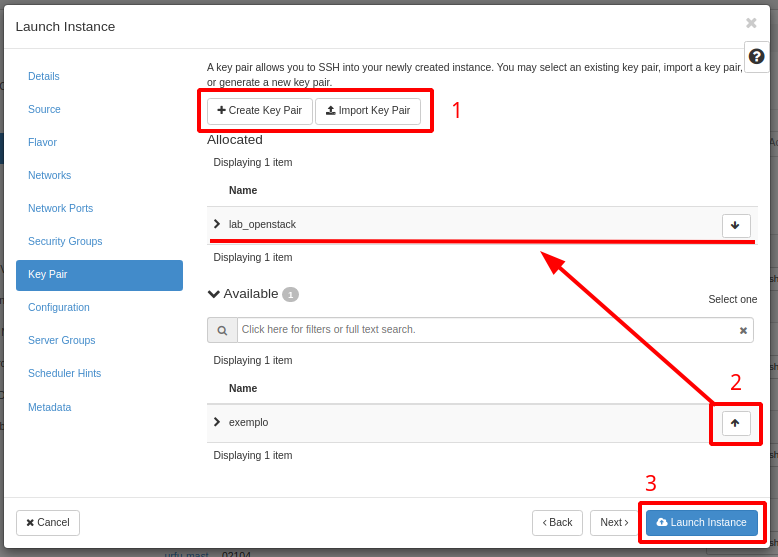
Now we associate a Key Pair. At this point you can create or import a new key. You can also use keys created earlier. Click here for more detail on access keys
We now have the minimum needed to launch the instance. At the bottom, click Launch Instance (item 3)
Resizing compute instances
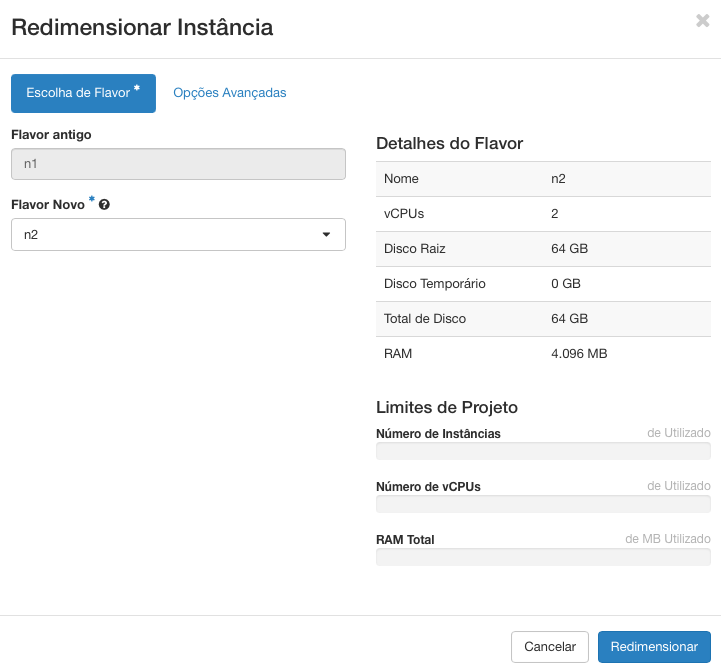
To resize a compute instance, open the instance's menu and select the flavor you want.
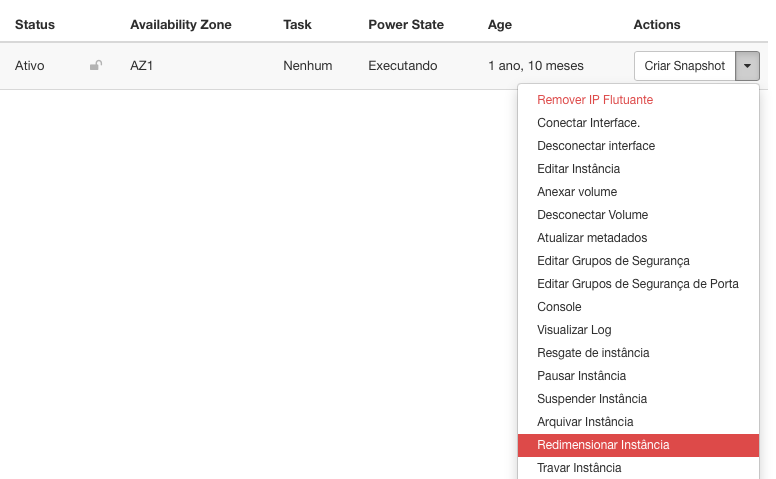
Then select the new flavor and click Resize
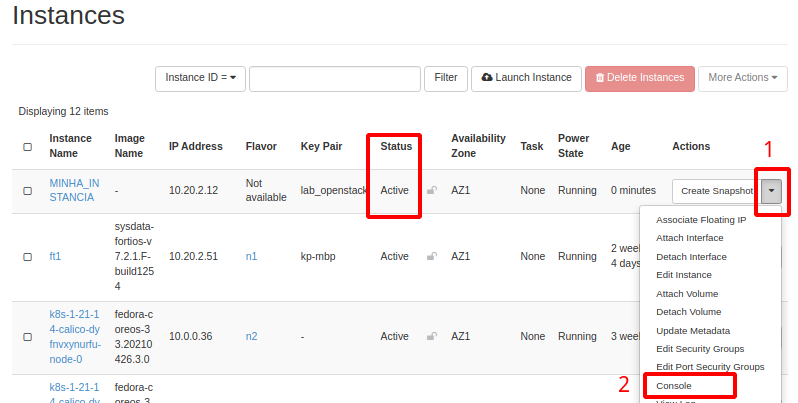
Each instance you create appears in the list, as shown below. You can manage the instance using the buttons at the top or on the right of each row, as in (item 1).
To reach the instance console, click the down arrow (item 1) and then Console (item 2)
The Status column, as shown, reports the instance's state (running, shut down, restarting, and so on)
Shutting down and restarting compute instances
The restart instance and shut down instance options send a signal to the compute instance's operating system and wait up to 60 seconds for the shutdown or restart. If it does not happen, the platform carries out the operation abruptly. In some cases this can damage the system (a broken MBR, a corrupted file system, and so on) and it may fail to boot again. So where a service or application may not respond in time and stop cleanly, we recommend stopping the service or application manually first — and even shutting the OS down manually through software (on Linux, from the command line, with reboot and shutdown; on Windows, through the restart and shut down menu options), preferably stopping the applications and services by hand beforehand.
Troubleshooting
Problem: Cannot connect to a Linux compute instance after changing the network interface and/or network
Check the compute instance log for a message like the following, probably with a different MAC address (fa:16:3e:09:e8:d1 in the example below) and a different interface name (ens3 in the example below):
[WARNING]: Failed to rename devices: [nic not present] Cannot rename mac=fa:16:3e:09:e8:d1 to ens3, not available.
To check the compute instance log, go to Compute, Instances, click the link with the instance's name, then the Log tab, then View Full Log, and search for part of the message above
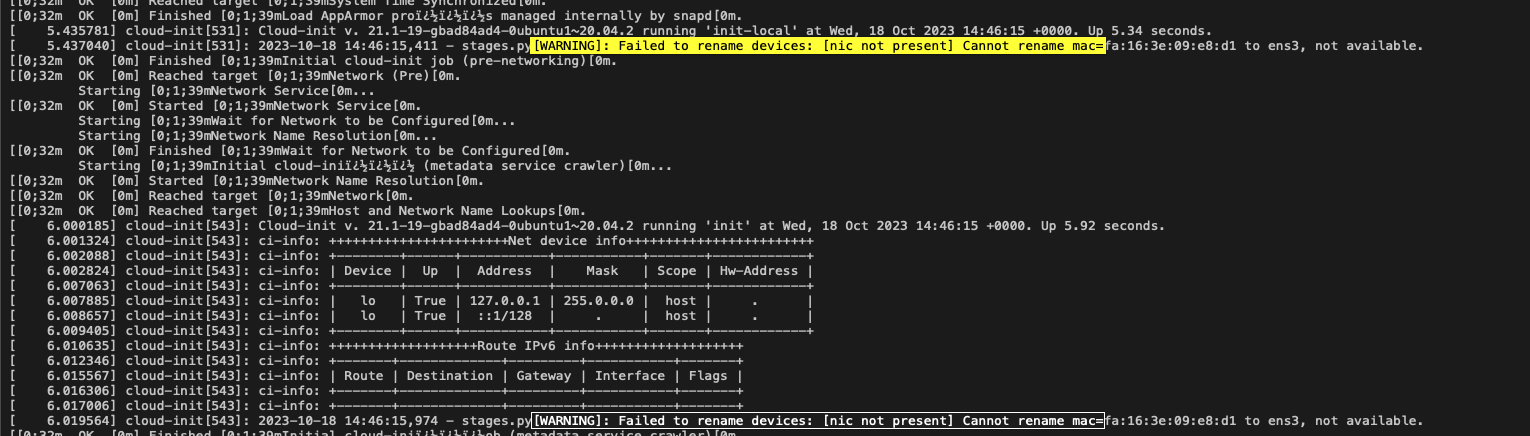
Take the MAC address and create a port on the network you want with that MAC address. For more on creating a network port, see (Networks walkthrough, Ports).
The port must be created and configured with security groups carrying the rules you need.
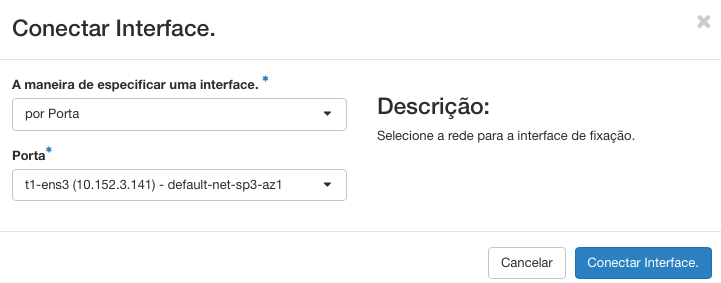
Once the network port is created on the network you want, you need to attach it to the compute instance. Click Attach Interface, set The way to specify an interface to by Port, and under Port select the port you created — t1-ens3 in the example below:
Next steps
Was this page helpful?
Report a problem on this pageDo not send passwords, keys, tokens, or customer data.